


Practical Guide to Tiling
Applying ceramic tiles is an essential step in transforming any environment, bringing beauty to the space, as well as durability, resistance to humidity and ease of maintenance.
To ensure the result is perfect, it is essential to use the right tools and follow the best practices.
Ceramic Tile Application: Step by Step
1. Surface preparation
Before starting the application, make sure that the surface is clean, dry, and levelled. Some irregularities can make it difficult for the ceramic tiles to adhere evenly. Use a level or a ruler-type spirit level to ensure that the floor and/or wall are well prepared for the application of the ceramic tiles.
2. Mixing and applying the mortar
Use a mortar suitable for the type of ceramic tile and surface. Mix the mortar following the manufacturer's instructions. Use a bucket and a mixer to ensure a homogeneous consistency. Leave the mixture to rest for a few minutes and then mix again. It is advisable to follow the mortar manufacturer's instructions to obtain the desired consistency for each application.
With the notch adhesive spreader, apply an even layer of mortar to the surface, starting at one corner. Run the spreader at a 45-degree angle to create grooves in the mortar, which will guarantee better adhesion of the ceramic tiles.
3. Cutting the ceramic tiles
Use VITO’s Manual Tile Cutter to cut the tiles to the required dimensions. Position the piece on the tool, align it according to the desired measurement, hold it firmly and apply pressure to make a clean, precise cut. This step is crucial to ensure that all parts fit correctly, especially in contoured areas or next to walls. It is particularly important to ensure the stability of the Tile Cutter so that the cut is made cleanly and precisely.

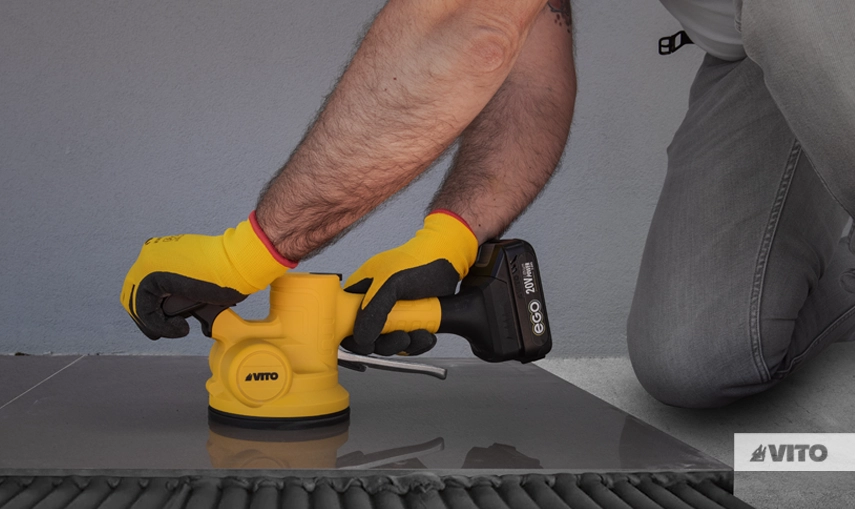
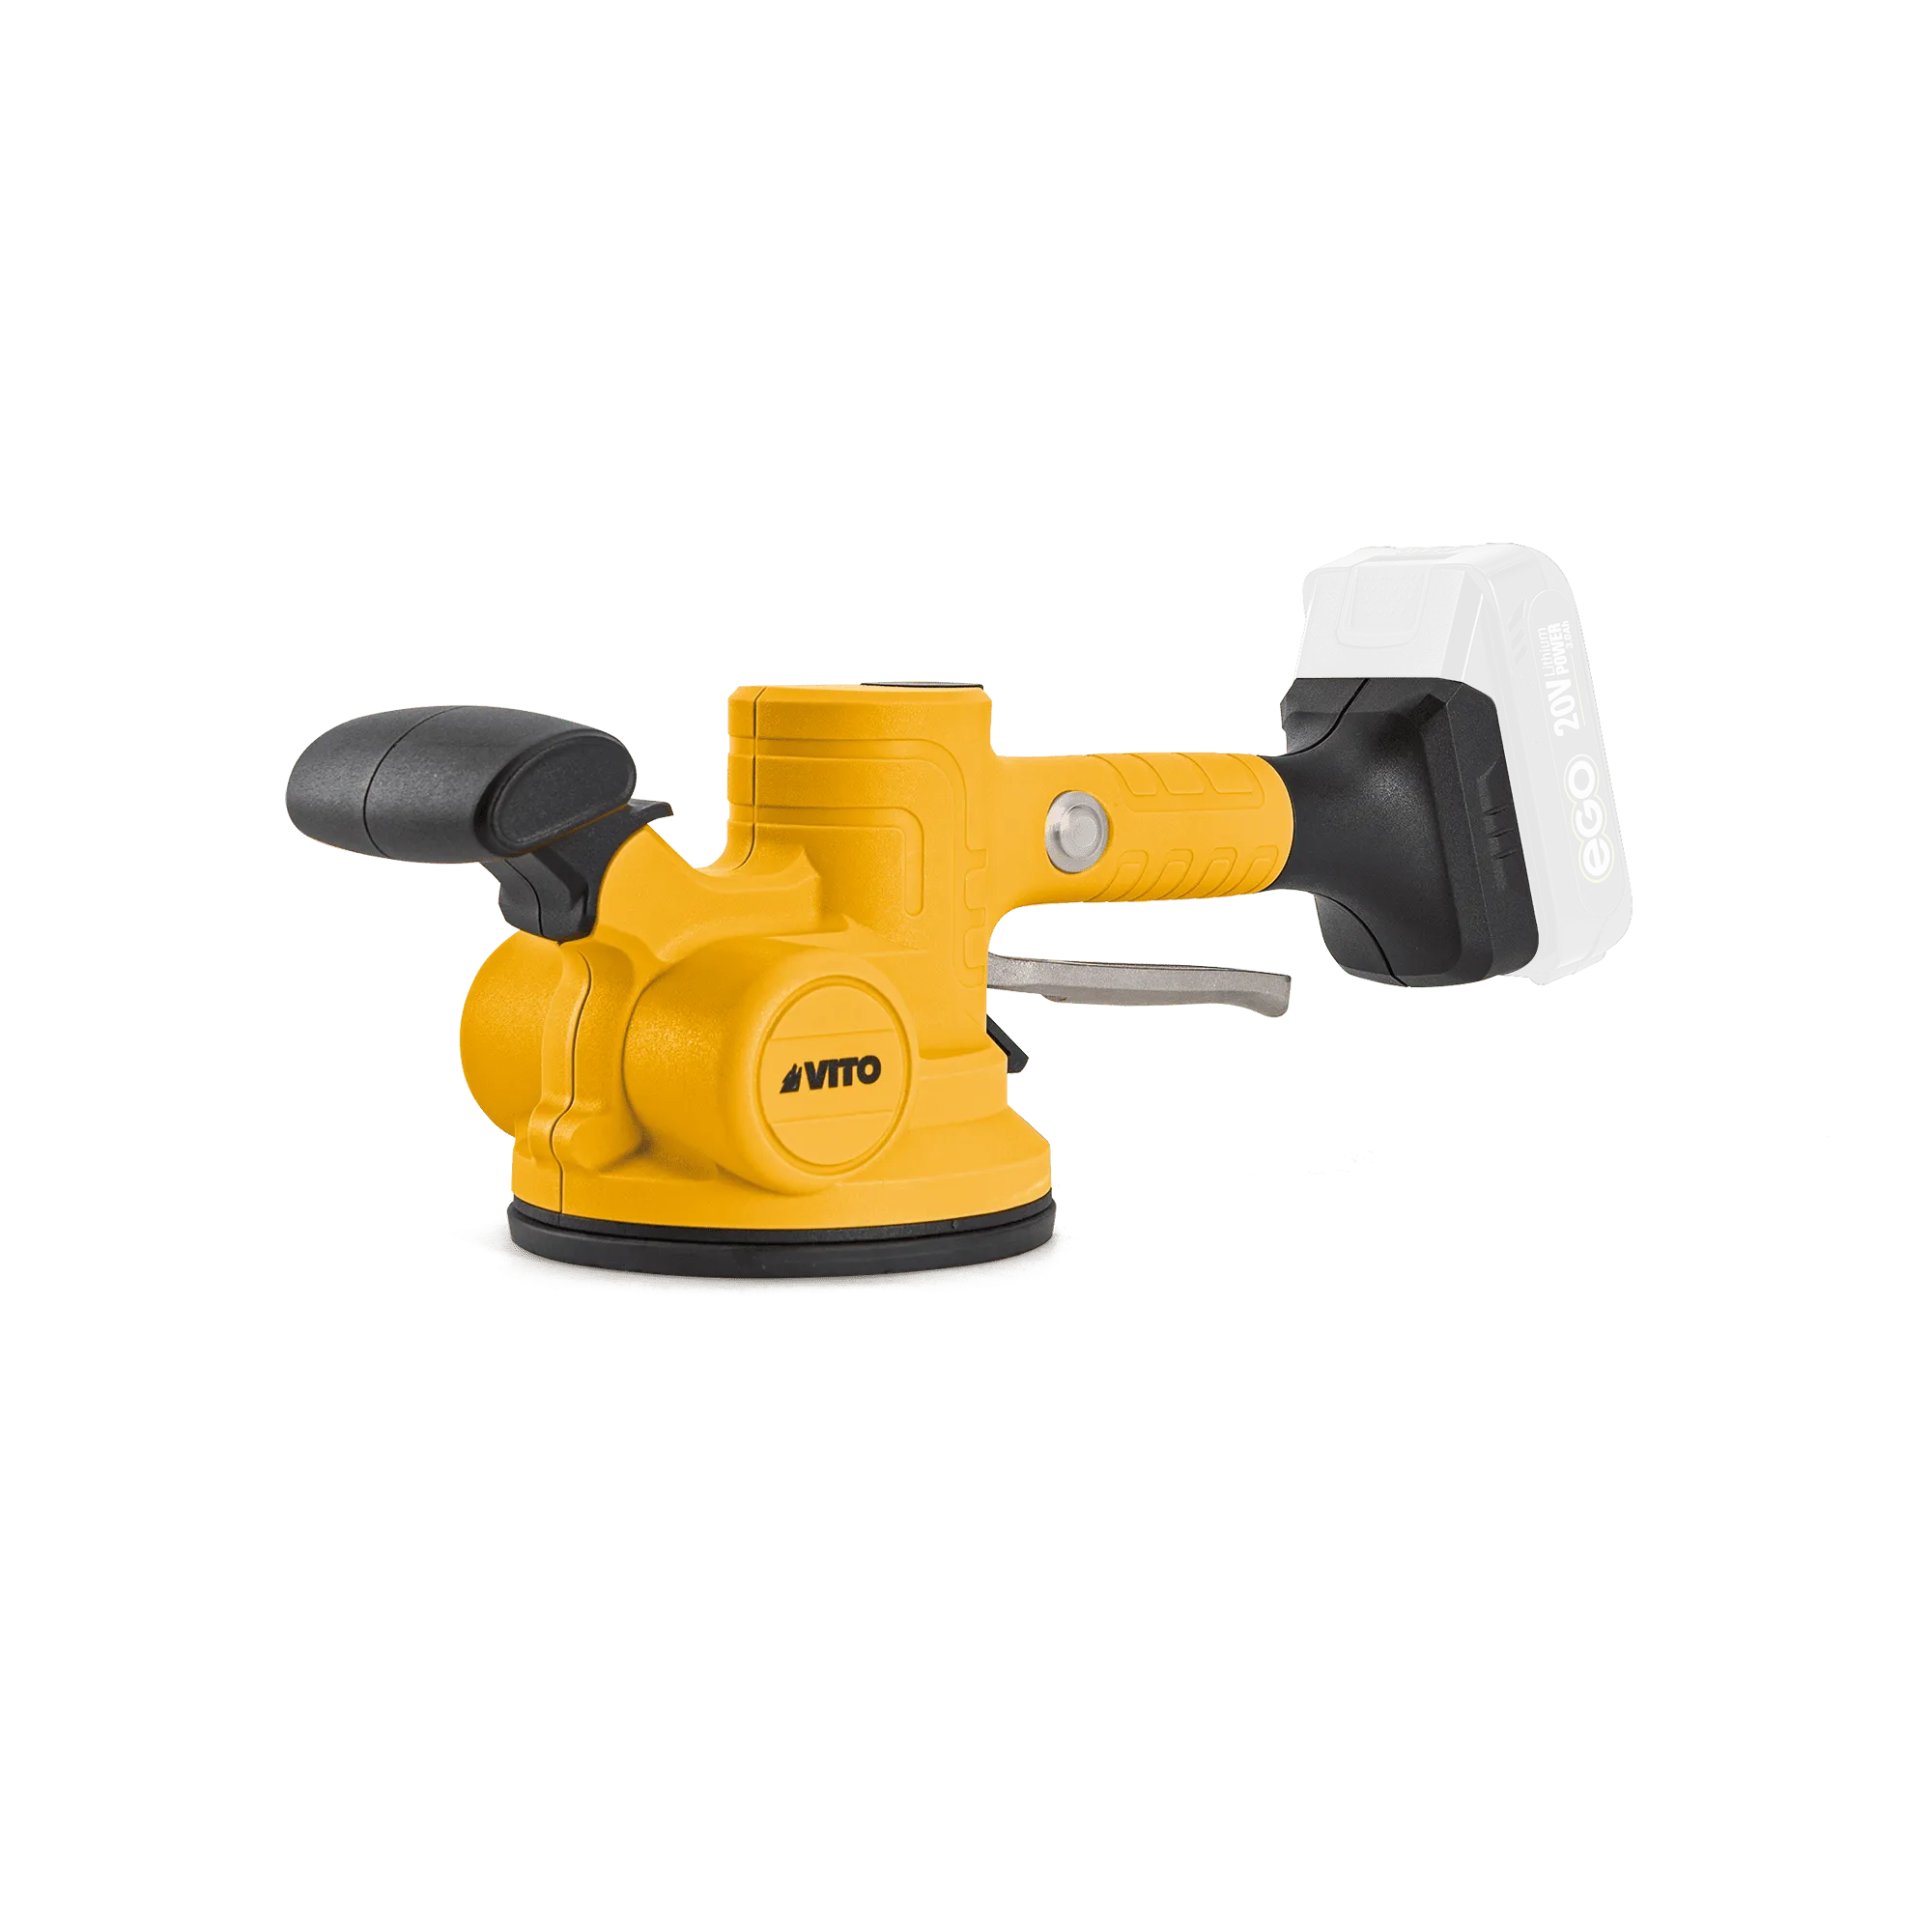
4. Installing the tiles with the vibrating suction cup
After applying the mortar, position the ceramic tile in place.
Use VITO’s Tile Vibrating Suction Cup to adjust the tile securely, especially if it is of a large size. Switch on the vibrating function to eliminate air bubbles in the mortar and ensure a firm, well-compacted fixing. The vibrating suction cup is indicated to ensure that the three elements (floor/wall + mortar + ceramic tile) adhere perfectly to each other, resulting in a perfect finish.
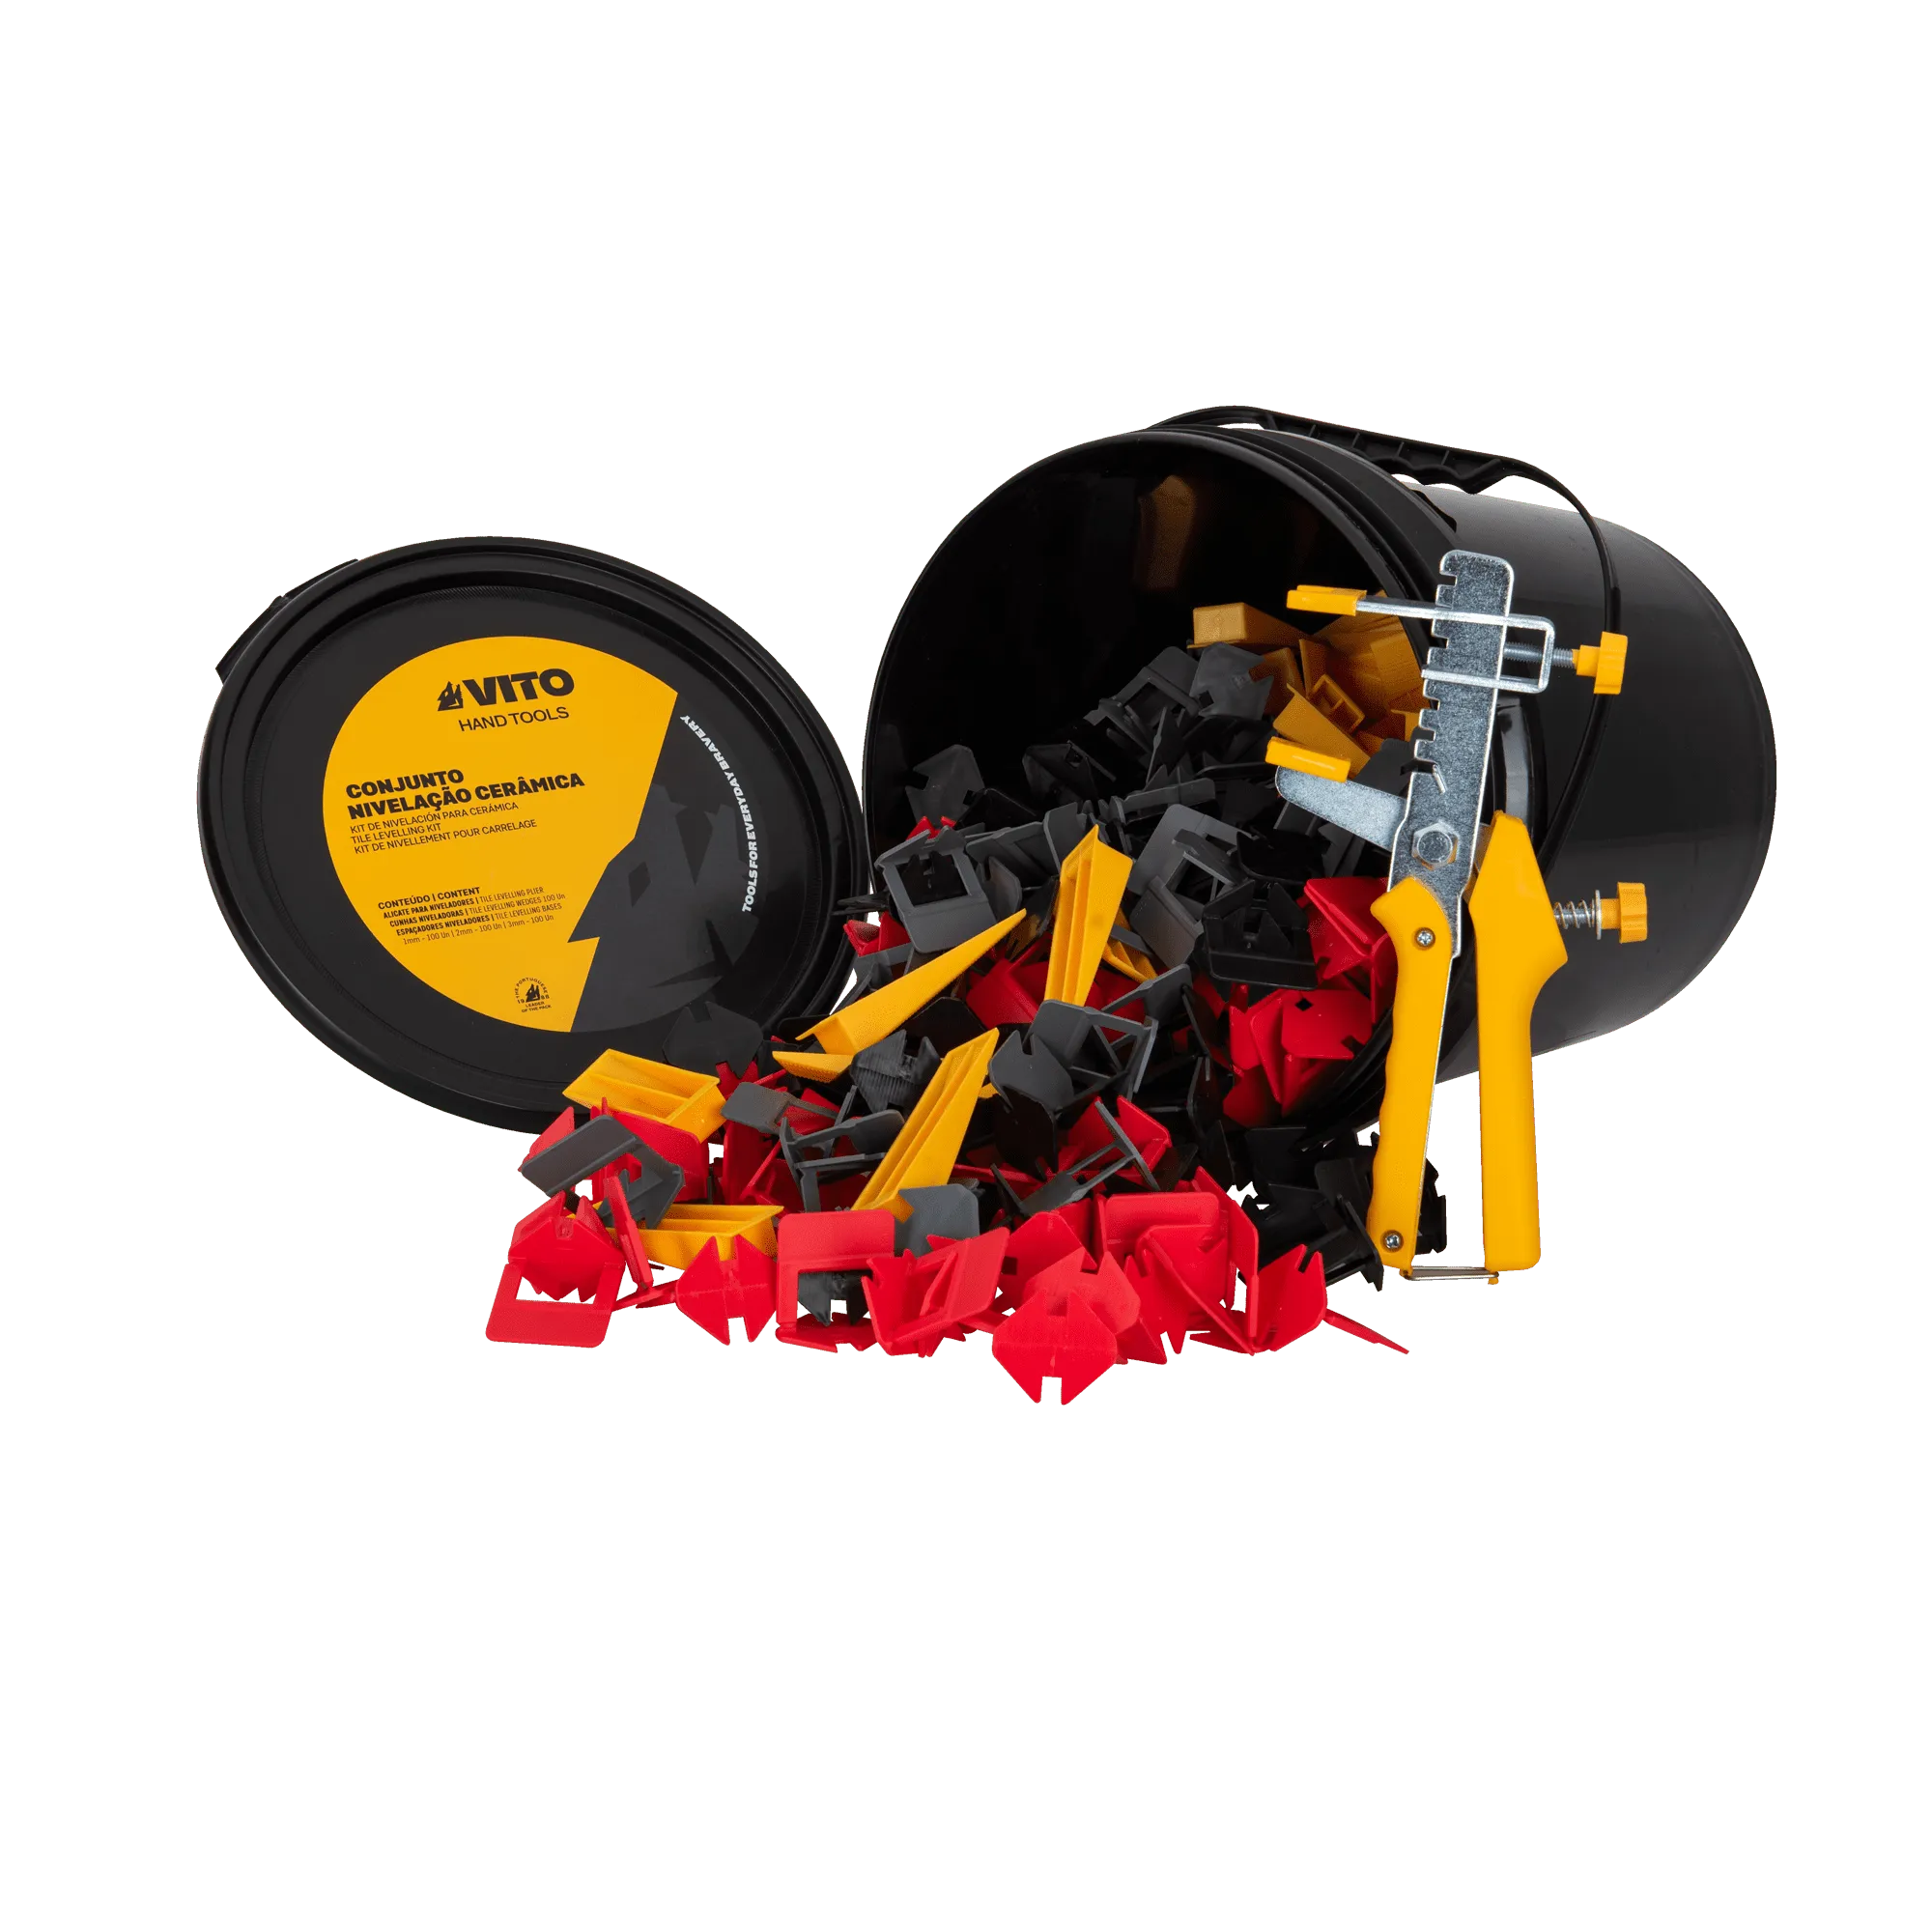
5. Levelling the ceramic tiles
VITO’s Tile Levelling Kit is essential for ensuring that all ceramic tiles are level and perfectly aligned. After positioning each tile, place the spacers of the levelling kit between the edges of the ceramic tiles. This ensures that all the tiles are the same height, avoiding any unevenness that could jeopardise the final result.
6. Setting and grouting
After installing and levelling all the tiles, wait for the mortar to dry. Then remove the spacers from the VITO Levelling Kit and apply grout between the tiles, using a spatula to fill all the joints. Finish by wiping off the excess grout with a damp sponge before it dries.
Final Tips for a Perfect Finish
- Respect the drying time: Avoid stepping on or putting weight on the tiles before the mortar and grout are completely dry, to avoid shifting and poor fixation.
- Read the manufacturer's instructions: To obtain the desired result, it is important that you read and follow the cement manufacturer's instructions for each intended application.
- Verify the levelling: Use the Tile Levelling Kit to ensure an even finish throughout the installation.
- Pay attention to the details: Precise cuts and the use of the vibrating suction cup for perfect adhesion will make all the difference in the final result.
- And last but certainly not least: Having clean tools and a clean working environment will guarantee a perfect finish.


- Contacts
- Contact form support@vito-tools.com
 +351 967 817 569
 * text messages only
Subscribe our newsletter
Become BRAVER every day. Be updated with all the latest news, promotions and campaigns from VITO.


Elected brand
by Portuguese!
© 2025 VITO . All rights reserved.
TOOLS FOR
THE BRAVE
Present in the market for over 30 years, VITO is a national and international reference in machines, tools, equipment and accessories for construction, agriculture, gardening, security and auto. With a presence in more than 2,000 points of sale, VITO is within walking distance of what you need.